How to create a Liquidity Pool on xExchange
The listing process
Any project is, in principle, eligible for listing. A simple criteria is to have an ESDT token, either natively minted on the MultiversX blockchain, or bridged over from another ecosystem.
Important: Tokens can be paired only with WEGLD, USDC, USDT, MEX, LEGLD, WBTC, WETH, WDAI, USH and XEGLD.
Register New Token
Add your token to the MultiversX Branded Assets repository as described here https://github.com/multiversx/mx-assets. Once the registration process is complete, your token will be usable in the xExchange for the next steps of the listing process.
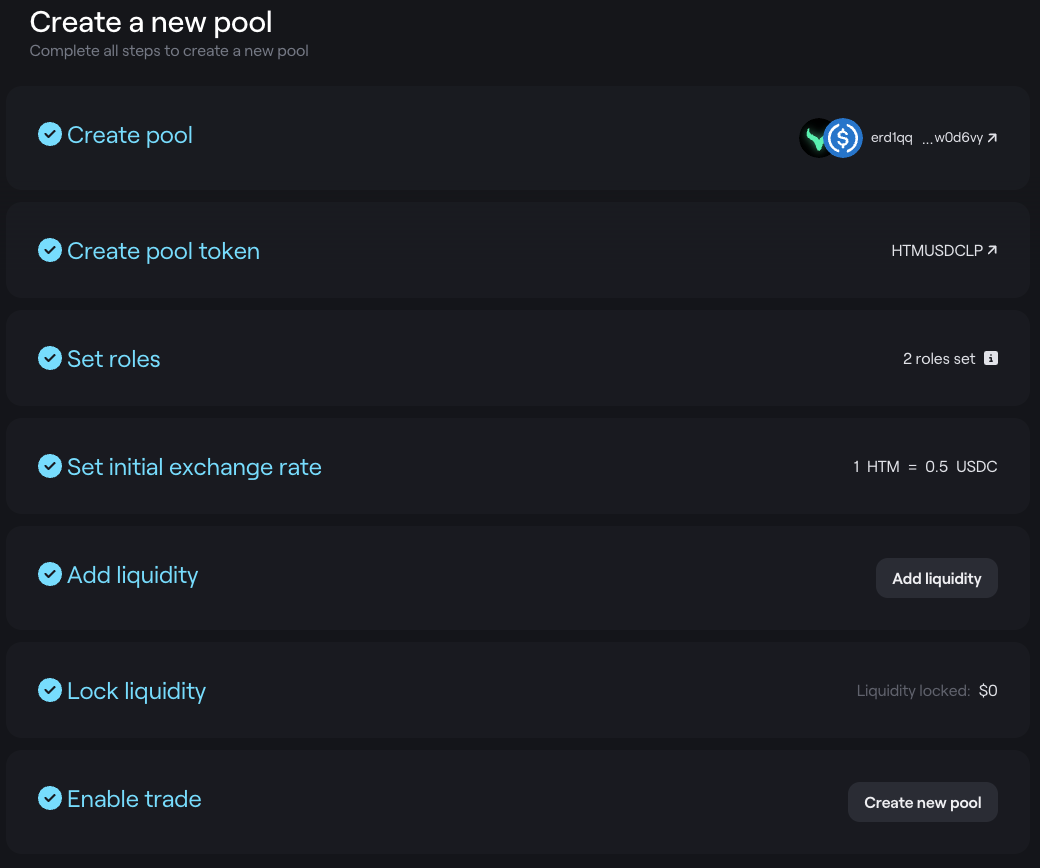
1. Create Pair
You will be able to create a liquidity pool for your token or any other token with the available pairing tokens. To avoid pair spamming, only the token owner wallets can create new pairs via the xExchange frontend.
- Click “...” from the top menu
- Click “Create Pool” menu item
- Select your desired first and second token
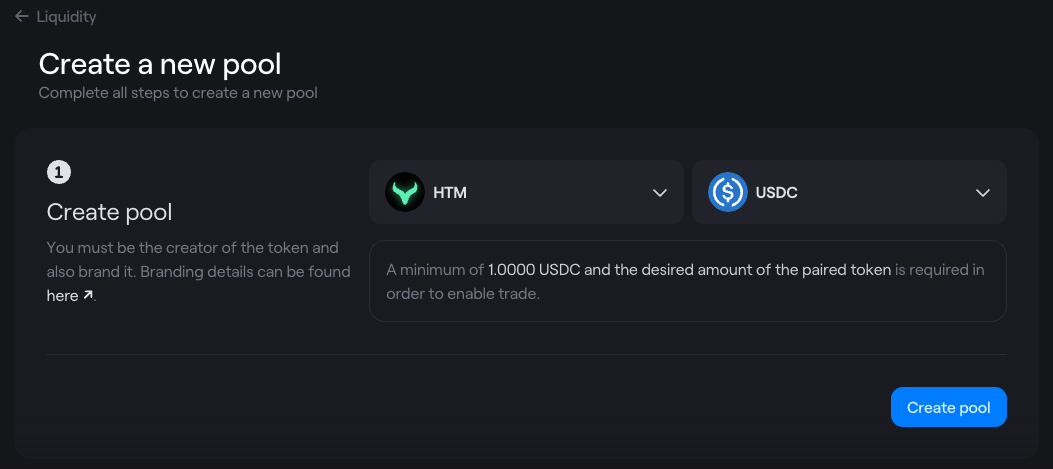
- Click on “Create Pool” button
2. Create Pool Token
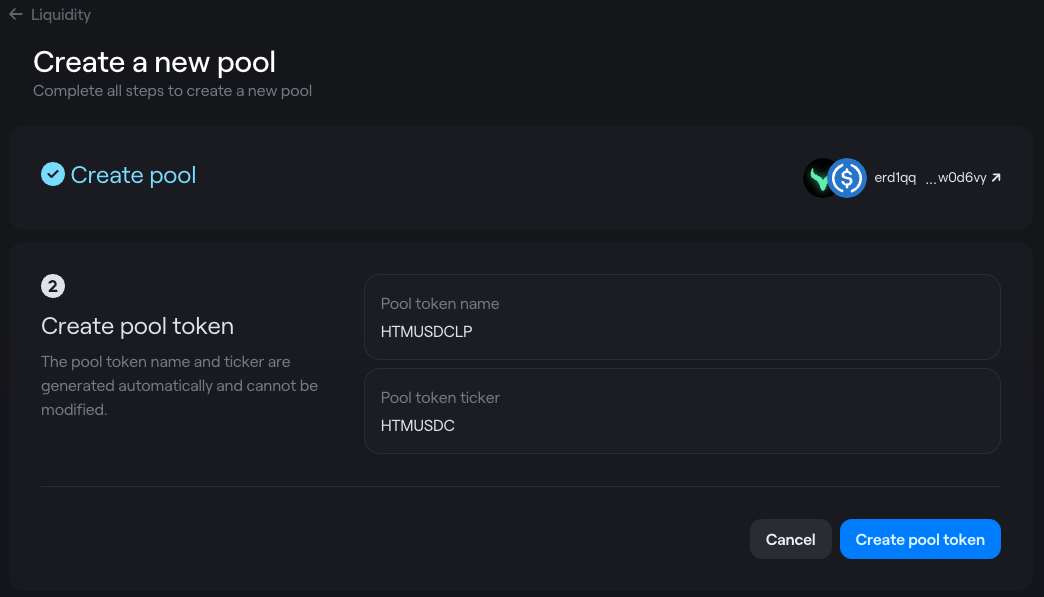
During the next step, the interface will show the pool contract address. Also, you will be able to set up your LP Token Name and Ticker (must be between 3 - 10 characters long)
- Click "Create Pool Token"
3. Set Roles
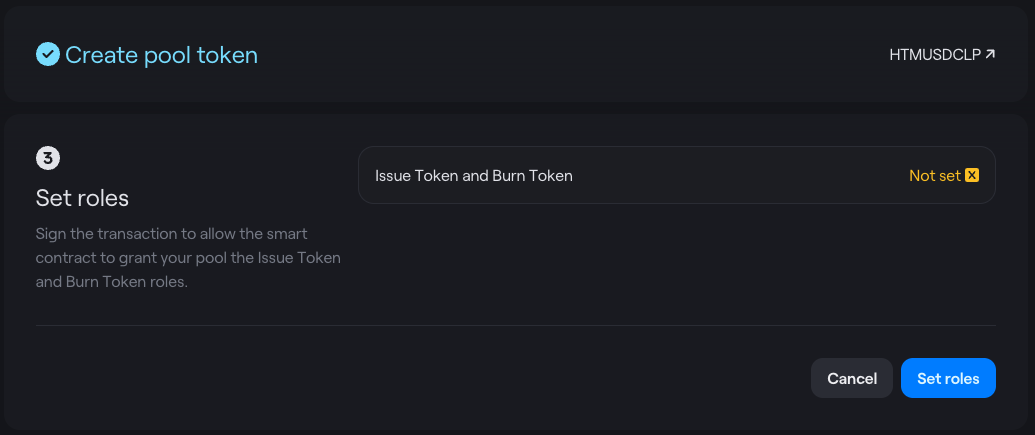
- Click "Create Set Roles"
4. Initial exchange rate
Token creators will set the parity between their listed token and its pair by adding initial liquidity. The ratio between the two tokens determines the initial token price.

Make sure you set the right ratio between the tokens, and that you have the specified amounts available in your wallet, then click on "Set initial exchange rate".
After the add liquidity transaction is confirmed, your Liquidity Pool will be successfully created.
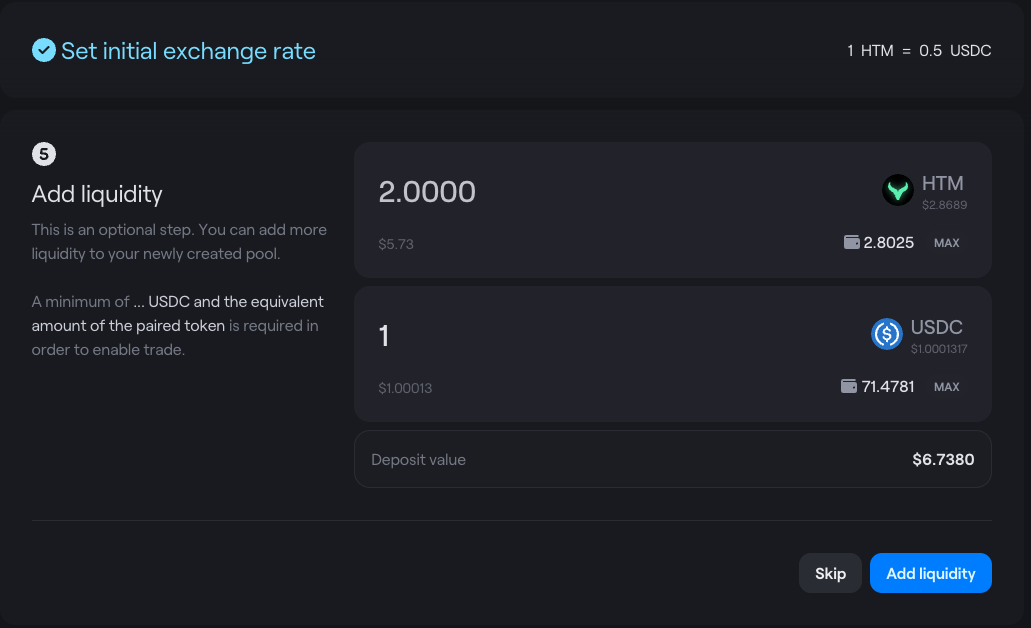
5. Add liquidity
In order to enable Trade you need to add a minimum liquidity that is described on the left and is specific to each token combination. This liquidity needs to be locked on the next step
6. Lock liquidity
Select the minimum required LP amount.
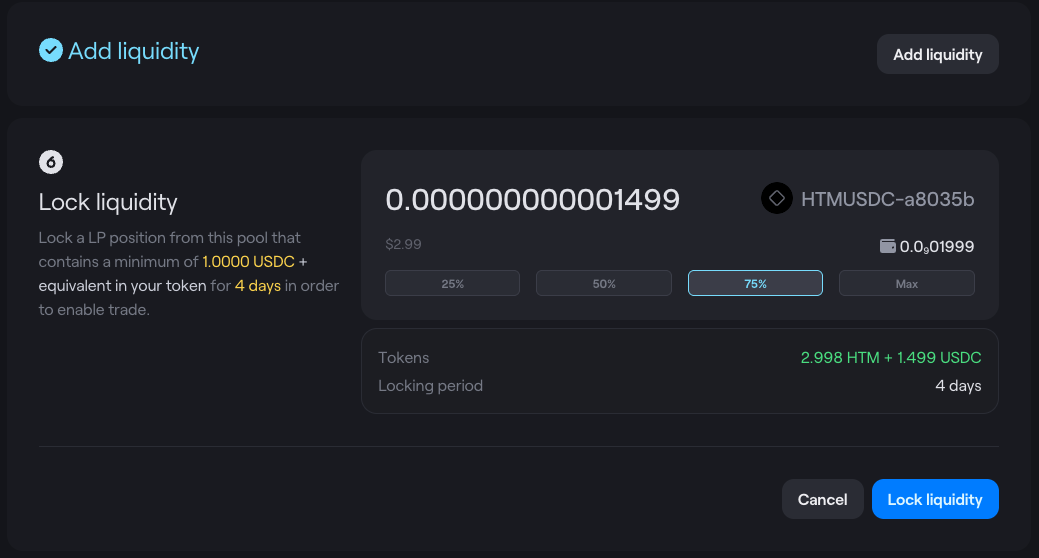
You can unlock your LP after a short period of time.
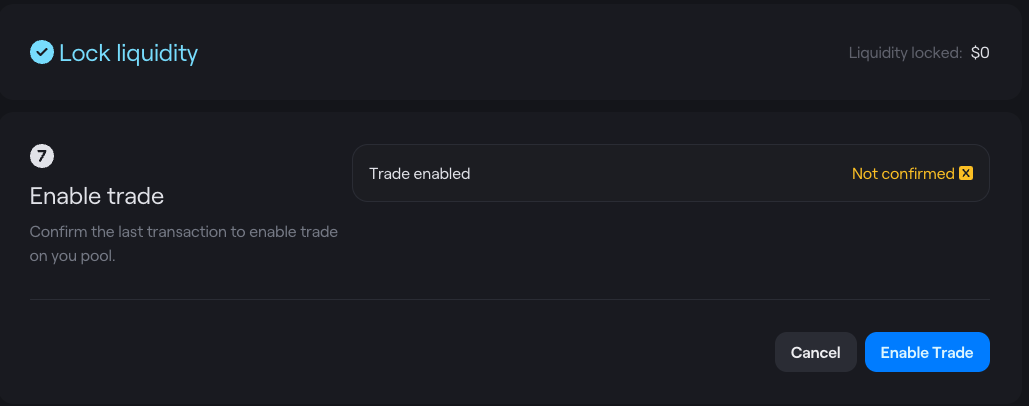
7. Enable Trade
After executing the enable Trade transaction at this last step, trade will be enabled for your pair.
Congratulations!
Your pool has been created and trade is enabled!